Wood floor scratch repair is essential for maintaining the warmth, elegance, and timeless charm that wood floors bring to any home. Although beautiful, wood floors are prone to scratches from daily wear, pet claws, moving furniture, and minor accidents. Even small scratches can detract from your floor’s overall look and, if left untreated, may lead to further damage. Fortunately, repairing wood floor scratches is simple, with a few easy steps that restore their natural beauty.
In this guide, we’ll walk through five quick, effective, and straightforward methods for wood floor scratch repair, helping you handle everything from light surface scratches to deeper gouges.
Step-by-Step Guide to Wood Floor Scratch Repair
Step 1: Clean and Prep the Area
Before attempting any scratch repair, it’s essential to ensure the area around the scratch is clean. Dust, dirt, or grime around the scratch can prevent repair products from adhering correctly and may make the scratch more noticeable.
Here’s how to properly prep the area:
- Sweep or vacuum the area: Use a vacuum cleaner or microfiber mop to remove any dirt or debris that could interfere with your repair efforts.
- Use a gentle wood floor cleaner: Avoid harsh chemicals. Instead, opt for a wood-safe cleaner and a soft cloth. A microfiber cloth is perfect, as it won’t scratch the floor further.
- Dry the area completely: Any moisture can interfere with repair products, so use a dry, soft cloth to ensure the area is fully dry before moving to the next step.
Prepping the area properly will give you the best results and allow repair solutions to adhere more effectively, creating a longer-lasting repair.

Step 2: Assess the Scratch Type and Depth
Not all scratches are created equal, and the method you use to repair them depends on the depth and type of scratch. Generally, scratches fall into three categories:
- Surface-level scratches: These are shallow marks that affect only the finish or varnish layer.
- Deeper scratches reach beyond the surface finish but not deep into the wood grain.
- Gouges: Severe scratches or dents that penetrate deeply into the wood.
Understanding the scratch type will help you choose the right repair method and products. Here’s a breakdown:
- For surface scratches: You may only need a wood polish or finish repair pen.
- For deeper scratches, Consider using a wood filler or putty stick to fill in the scratch.
- Gouges may require sanding and refinishing for seamless repair.

Step 3: Use a Wood Repair Marker or Wax Stick for Surface Scratches
Surface-level scratches are usually the easiest to fix and don’t require any complicated tools or materials. A wood repair marker or wax stick that matches your floor’s color can work wonders for light scratches.
Here’s how to use a repair marker or wax stick:
- Choose a matching color: Test on a small, hidden area to ensure a good color match.
- Apply the marker or wax stick to the scratch. Follow the wood grain for a natural look. If you’re using a marker, gently color over the scratch, and for a wax stick, rub it over the scratch, filling in the mark.
- Buff with a soft cloth: Buff the area with a soft cloth to blend the repair into the surrounding floor. This will help the repair look natural and even.
This quick fix can make scratches nearly invisible, and wax sticks, in particular, also add a small layer of protection.
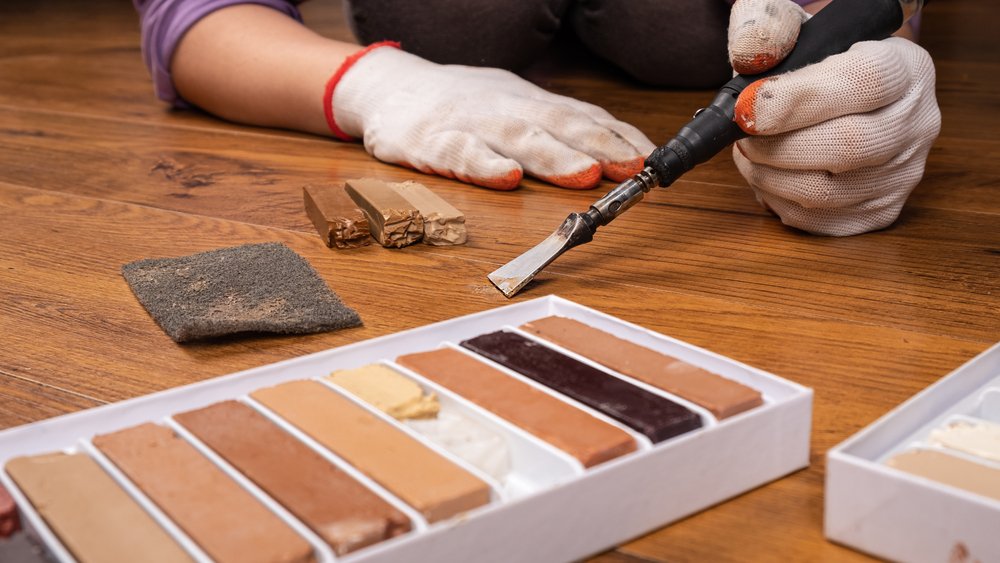
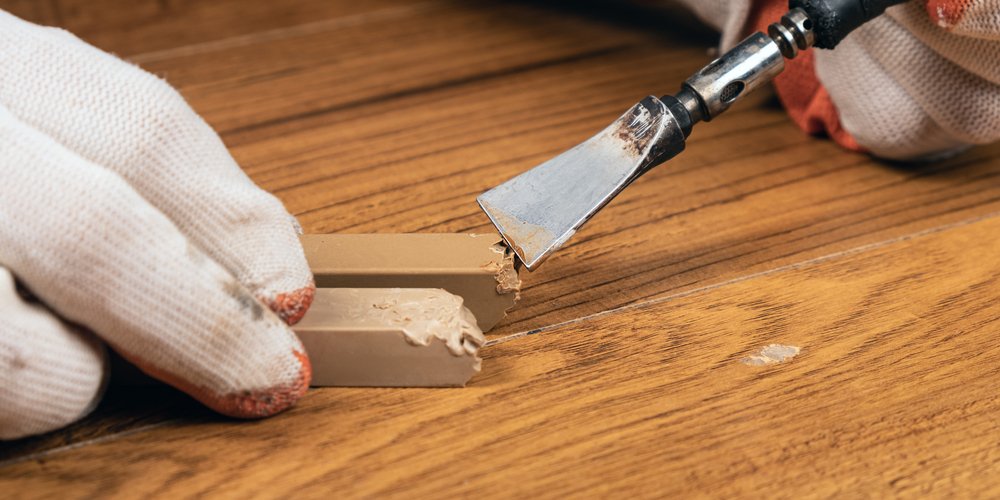
Step 4: Use a Wood Filler or Putty for Deeper Scratches
For scratches that are deeper but not quite gouges, wood filler or putty can provide a more substantial repair. This method is ideal for scratches that penetrate beyond the finish into the wood grain.
Follow these steps to use wood filler or putty:
- Select a color-matched wood filler or putty: For a seamless finish, try to find a shade close to your floor’s color.
- Apply the filler carefully: Press the filler into the scratch using a small putty knife or your finger, ensuring it completely fills the gap.
- Smooth the surface: Wipe away any excess wood filler around the scratch, and use the edge of the putty knife to smooth it out.
- Let it dry completely: Most wood fillers take a few hours.
- Lightly sand the area (optional): If needed, lightly sand the dried filler with fine-grit sandpaper to achieve an even surface. Be gentle and only sand the filled area.
Once the wood filler has dried and been smoothed, the scratch will be far less noticeable, and you’ll have prevented further damage by filling it in.

Step 5: Apply a Finish or Polish to Seal the Repair
After repairing scratches, applying a wood finish or polish can help to protect the repaired area and blend it seamlessly with the rest of the floor. This final step also adds an extra layer of shine, enhancing the overall look of your floor.
How to apply finish or polish:
- Choose the right product: Select a wood floor polish or finish that matches your floor’s sheen (matte, semi-gloss, or gloss). Be sure it’s safe for wood.
- Use a soft cloth for application: Apply the polish to a clean, soft cloth and rub it over the repaired area in circular motions.
- Buff to a smooth finish: Once the polish is applied, buff it gently to remove any excess and to create a soft, even surface.
This final wood floor polish enhances the appearance of the repair and protects your floor against future scratches and wear.

Bonus Tips to Prevent Future Scratches on Wood Floors
Now that you’ve successfully repaired your wood floor scratches, it’s worth taking some precautions to minimize future scratches.
- Use felt pads on furniture legs: Protect your floors from furniture movement.
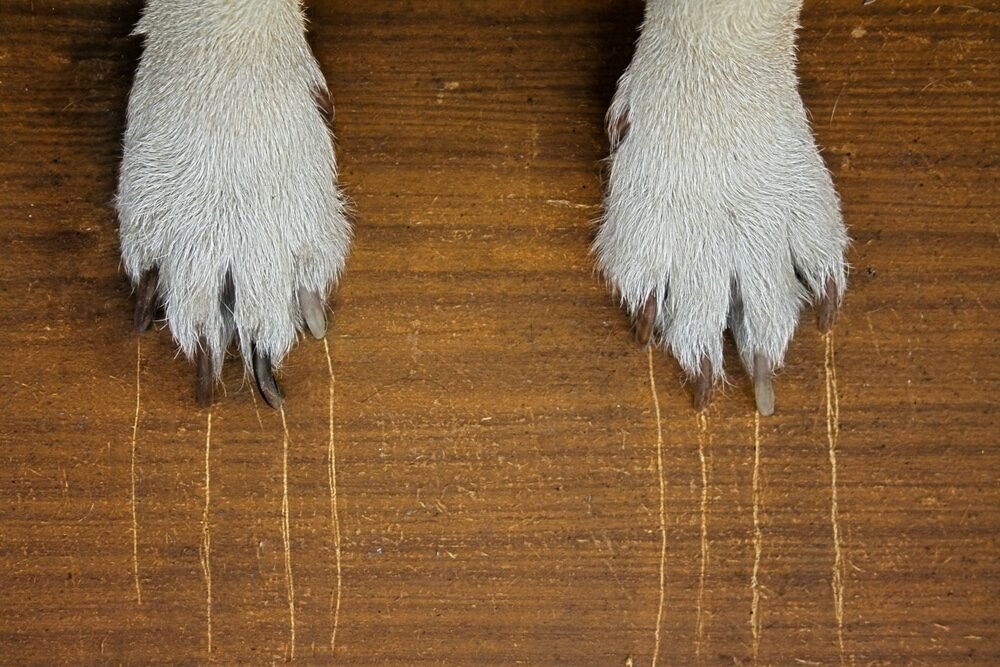
- Trim pet nails regularly: This simple step can prevent a lot of scratching.
- Place area rugs in high-traffic areas: Use rugs in hallways, near entryways, and under frequently moved furniture.
- Clean floors gently and frequently: Dust, dirt, and debris can act like sandpaper, causing scratches.
- Use a floor-safe cleaning solution: Avoid harsh chemicals or abrasive materials that could damage the finish.
Conclusion
Repairing scratches on wood floors doesn’t have to be a daunting task. With the right tools and techniques, you can restore your floor’s original beauty in just a few simple steps. Whether dealing with a minor surface scratch or a deeper mark, these five quick methods cover a range of scratch types and provide reliable ways to make your floors look as good as new.
Following these steps, along with a few preventive measures, will keep your wood floors looking beautiful and scratch-free for years to come. Happy restoring!