Applying Oil Finishes on Wood Floors enhances their natural beauty and durability, making them a timeless choice for home decor. Wood floors bring warmth and elegance to any space, but maintaining their aesthetic appeal demands careful finishing techniques. Oil finishes are one of the best methods for enriching and safeguarding wood floors. In this comprehensive guide, we’ll delve into the advantages of oil finishes, outline the required materials and tools, and provide a detailed, step-by-step process for applying oil finishes to your wood floors.
Various options are available when choosing the right oil finish, each offering unique benefits. Selecting the appropriate type is crucial, from penetrating oils that nourish the wood to surface finishes that create a protective barrier. Additionally, understanding the application process can significantly impact your floors’ final look and longevity. This guide aims to equip you with the knowledge to make informed choices, ensuring your wood floors remain stunning and well-protected for years.

Table of Contents
1. Understanding Oil Finishes
Benefits of Oil Finishes
Oil finishes have gained popularity for their ability to enhance the natural beauty of wood while providing protection. Here are some of the key benefits:
- Enhanced Appearance: Oil finishes penetrate deeply into the wood, enhancing grain patterns and colour.
- Natural Look: Unlike synthetic finishes, oils maintain a natural look that complements the wood’s texture.
- Easy Maintenance: Regular maintenance is straightforward, often requiring simple reapplication rather than a complete refinish.
- Durability: High-quality oil finishes can resist wear and tear, moisture, and stains.
Types of Oil Finishes
There are various types of oil finishes available for wood floors. The most common include:
- Linseed Oil: A traditional choice that provides a warm tone but can take a long time to dry.
- Tung Oil: Known for its water resistance and durability, it dries faster than linseed oil.
- Danish Oil: A blend of oils and varnishes, it offers a protective finish with a natural appearance.
- Hardwax Oil: Combines the benefits of oil and wax, providing a durable and water-resistant surface.
Choosing the right oil finish depends on your desired aesthetic and the level of protection needed for your floor.
2. Preparing Your Workspace
Tools and Materials Needed
Before starting the oil-finishing process, gather the following tools and materials:
- Tools:
- Floor sander (drum sander or orbital sander)
- Sanding pads (varying grits: coarse to fine)
- Clean rags or microfiber cloths
- Paint roller or brush
- Paint tray
- Putty knife (for repairs)
- Safety goggles and dust mask
- Materials:
- Oil finish (choose based on your preference)
- Mineral spirits or turpentine (for cleaning tools)
- Wood filler (if needed for repairs)
- Vacuum cleaner
Safety Precautions
Working with oil finishes can involve fumes and dust. Here are some safety measures to consider:
- Ventilation: Ensure your workspace is well-ventilated—open windows and doors to allow fresh air circulation.
- Protective Gear: Wear safety goggles and a dust mask to protect against fine dust particles and fumes.
- Fire Safety: Oil-soaked rags can spontaneously combust if not appropriately handled. Store used rags in a sealed metal container or soak them in water before disposal.
3. Preparing the Wood Floor
Preparation is critical to achieving a professional-looking finish. Follow these steps to prepare your wood floor.
Cleaning the Surface
Start by thoroughly cleaning the wood floor to remove dirt, dust, and debris. Use a vacuum cleaner to eliminate loose particles and follow up with a damp cloth to capture any remaining dust. Ensure the floor is completely dry before proceeding.
Sanding the Floor
Sanding the floor is crucial for ensuring proper adhesion of the oil finish. Here’s how to do it:
- Choose the Right Sander: A drum sander is effective for larger areas. For corners and edges, use an orbital sander or a hand sander.
- Start with Coarse Grit: To remove old finishes and imperfections, begin with coarse-grit sandpaper (e.g., 36 or 60 grit).
- Progress to Finer Grits: Gradually move to finer grits (e.g., 80 to 120 grit) for a smooth surface.
- Sand with the Grain: Always sand in the direction of the wood grain to avoid scratches.
- Clean Up Dust: After sanding, vacuum the area again to remove dust particles.
Assessing Damage and Repairs
Inspect the floor for any damage, such as scratches, dents, or gaps. If you find any, you may need to repair them before applying the oil finish:
- Filling Gaps: Use wood filler that matches the colour of your wood. Apply it with a putty knife, let it dry, and sand smooth.
- Addressing Scratches: You can rub some matching stains or sand them down for minor scratches. Deeper scratches may require more extensive repairs.

4. Applying Oil Finishes on Wood Floors
With the floor prepared, it’s time to apply the oil finish. Follow these steps for a successful application.
Choosing the Right Oil
Select the oil finish that best suits your needs. Consider drying time, durability, and the desired sheen (matte, satin, or gloss). Always check the manufacturer’s guidelines for the specific product you choose.
Test Application
Before applying the finish to the entire floor, perform a test application in a small, inconspicuous area:
- Apply a Small Amount: Use a rag or brush to apply a small amount of oil to the test area.
- Observe Drying: Monitor the drying time and how the finish looks once cured.
- Assess Color and Appearance: Ensure the colour and sheen meet your expectations.
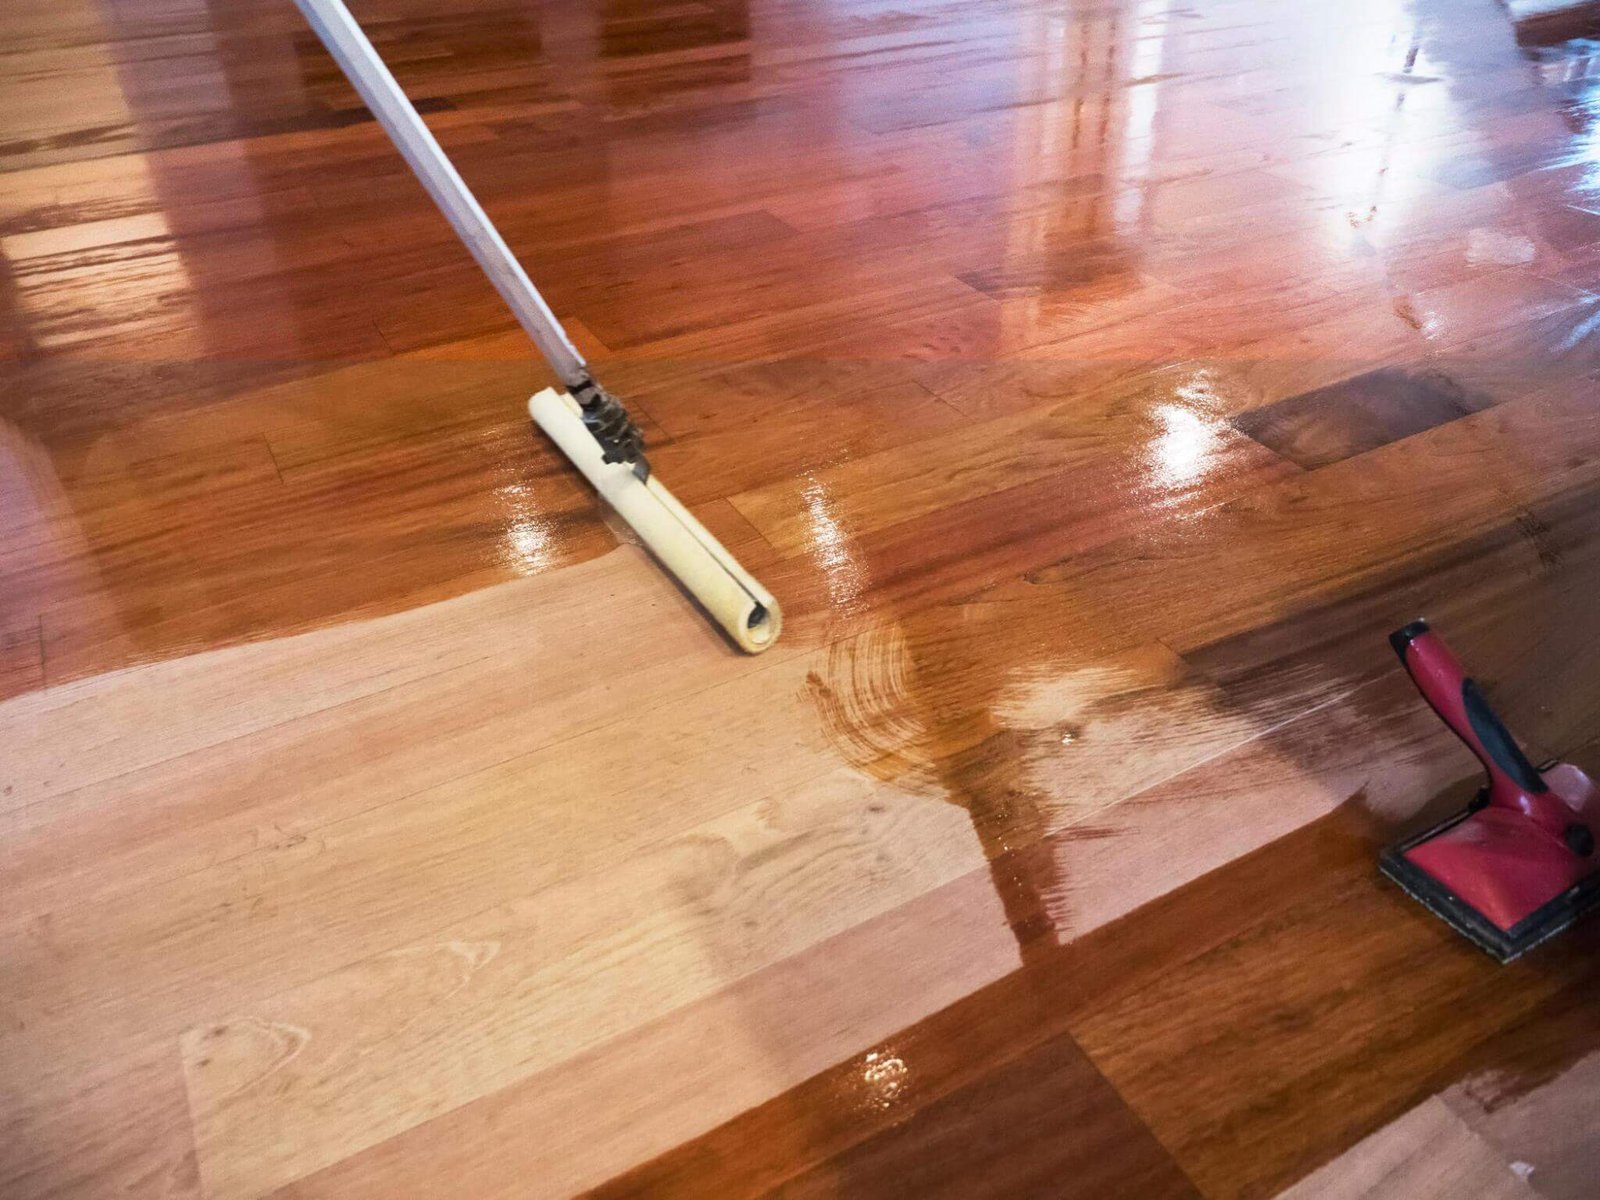
The Application Process
Once satisfied with the test area, you can proceed with the entire application:
- Preparation: Gather your tools and ensure the floor is clean and dry.
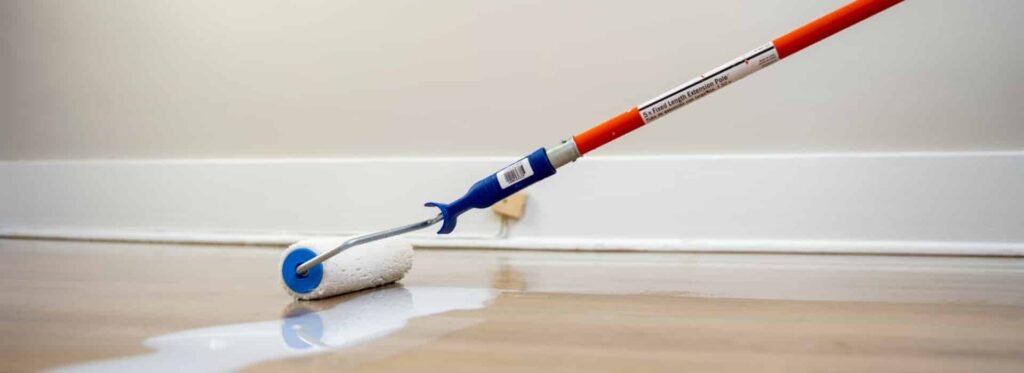
- Apply the Oil:
- Use a clean rag or a roller to apply the oil evenly across the floor.
- Work in small sections (about 4×4 feet) to ensure even application and avoid the oil drying before spreading it out.
- Apply oil generously, allowing it to soak into the wood for several minutes.
- Wipe Off Excess: After a few minutes, use a clean rag to wipe off any excess oil that hasn’t been absorbed into the wood. This step is crucial to avoid a sticky finish.
- Repeat: Continue this process until the entire floor is covered. Depending on the product, multiple coats may be necessary.
- Allow to Dry: Follow the manufacturer’s recommended drying time between coats. It can range from a few hours to overnight.
5. Curing and Maintenance
Once the final coat is applied, allow the oil finish to cure correctly for the best results.
Curing Time
Curing times vary based on the type of oil used and environmental conditions. Here are the general guidelines:
- Linseed Oil: This can take up to several days to cure fully.
- Tung Oil: Typically cures in 24 to 48 hours.
- Danish Oil and Hardwax Oil: Usually require about 12 to 24 hours for initial curing.
During the curing process, avoid heavy foot traffic and place furniture back on the floor until fully cured.
Ongoing Maintenance Tips
To keep your wood floor looking its best, regular maintenance is essential:
- Cleaning: Use a soft broom or vacuum to remove dust and debris regularly. Avoid excessive moisture when mopping.
- Reapplication: Depending on wear, reapply oil finishes every 6 to 12 months or as needed to maintain the finish.
- Spot Treatment: For areas needing attention, lightly sand and reapply oil to those spots to refresh the finish without refinishing the entire floor.
6. Conclusion
Applying oil finishes to wood floors is a rewarding project that enhances their beauty and longevity. Following this step-by-step guide, you can achieve a professional-looking finish highlighting the wood’s natural characteristics while providing the necessary protection.
Recap of the Steps
- Understand the benefits and types of oil finishes.
- Prepare your workspace and gather the necessary tools and materials.
- Clean, sand, and repair the wood floor.
- Choose the right oil, conduct a test application, and apply the finish evenly.
- Allow adequate curing time and maintain the floor regularly.
Final Thoughts on Oil Finishing
Investing time and effort into applying oil finishes on wood floors will yield stunning results that can transform your home. The natural beauty of wood is brought to life through oil finishes, enhancing its grain and color while providing a protective layer. This meticulous process not only boosts the aesthetic appeal but also ensures your floors withstand daily wear and tear, maintaining their elegance for years to come.
When applying oil finishes on wood floors, selecting the right type of oil that suits your specific needs is essential. Various options are available, such as penetrating oils that nourish the wood and surface finishes that create a durable barrier. Understanding the differences can help you choose the best product for your floors, ensuring you achieve the desired look and level of protection.
Proper technique is crucial when applying oil finishes on wood floors. A well-executed application can significantly affect the finish’s durability and appearance. Following the step-by-step process outlined in our guide will help you achieve a professional-looking result. With the right tools and materials, you can enhance the beauty of your wood floors while ensuring they remain well-protected against moisture and stains.
Ultimately, applying oil finishes to wood floors is a rewarding investment in your home. With proper care and maintenance, your wood floors will continue to shine and serve as a beautiful foundation for your living space for years to come. Commit to this finishing technique and embrace the beauty of your wood floors, and enjoy the lasting impact it brings to your home.

[…] with proper care, all wood floors will eventually show signs of wear. Knowing when to recoat your floor or when a complete re-sanding is necessary can help extend the life of your pine floor without […]
[…] Oil finishes, such as Danish or tung oil, penetrate the wood, enhancing its natural beauty while providing a softer, matte appearance. While not as durable as lacquer, they can be easily refreshed and are more forgiving of application mistakes. […]
[…] Modern finishes, including polyurethane and oil-based finishes, provide a protective layer that helps resist scratches, spills, and stains. These finishes create a barrier that enhances the floor’s durability and makes it easier to clean and maintain. For households with children and pets, opting for a floor with a high-quality finish can help extend its life and reduce the need for refinishing. […]