
Oiling wood floors is an age-old technique that enhances the beauty and durability of hardwood surfaces while providing a natural, warm finish. Unlike traditional finishes, which can create a barrier on the surface, oil penetrates deep into the wood, nourishing it and allowing the natural grain to shine through. This method not only elevates the aesthetic appeal of your flooring but also offers several practical benefits, including improved resistance to wear and tear, moisture protection, and easier maintenance. In this blog post, we will explore the advantages of oiling wood floors, the techniques involved in the process, and essential maintenance tips to keep your floors looking stunning for years to come.
As homeowners increasingly seek sustainable and environmentally friendly options for their living spaces, oil finishes have gained popularity for their natural composition and ease of application. Whether you’re considering oiling new wood floors or rejuvenating existing ones, understanding the right techniques can significantly affect the final outcome. From selecting the appropriate type of oil to mastering the application process, this guide will equip you with the knowledge needed to achieve beautifully finished wood floors. Let’s delve into the world of wood floor oiling, uncovering its many benefits and practical advice to help you maintain your investment.
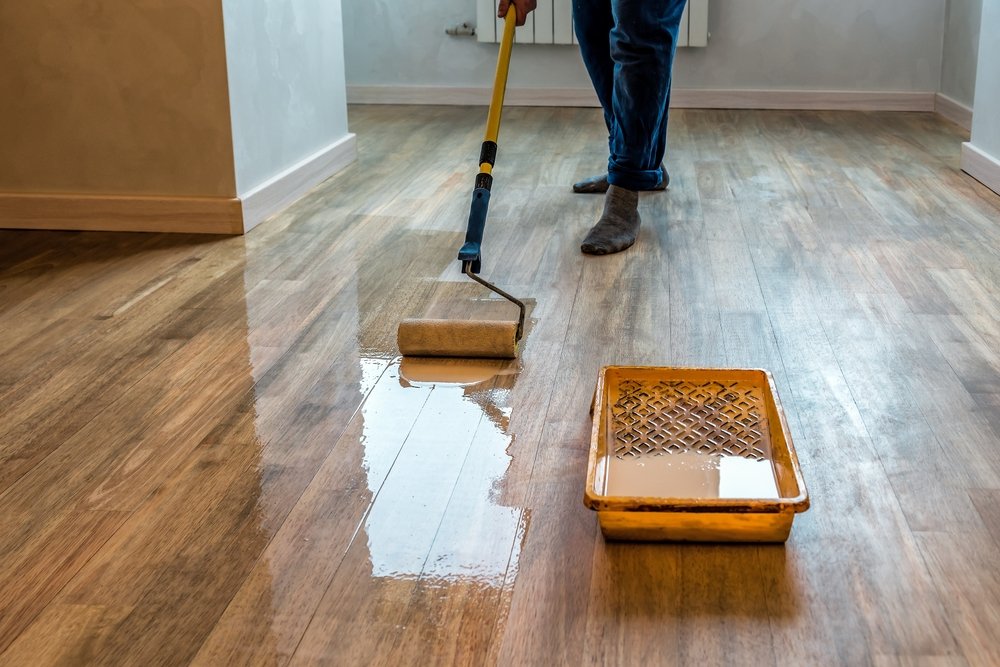
Table of Contents
The Benefits of Oiling Wood Floors
Oiling wood floors offers several advantages over finishing methods like varnishing or lacquering. Here are some key benefits:
1. Enhances Natural Beauty
Oils penetrate deep into the wood, enhancing its natural grain and colour. Unlike surface finishes, oiling maintains the wood’s organic appearance, providing a richer, more authentic look. This characteristic especially appeals to those who appreciate the beauty of natural materials.
2. Easy to Apply and Reapply
Oiling is generally easier than other finishing methods. Most oil finishes can be applied with a simple cloth or roller, making it accessible even for DIY enthusiasts. Furthermore, when maintenance is required, reapplying oil is straightforward and doesn’t require sanding down the entire floor.
3. Provides Durable Protection
While oils may not provide the same level of protection as hard finishes like polyurethane, they do create a durable barrier against moisture, dirt, and wear. Many modern oil finishes contain additives that enhance their protective qualities, making them a viable option for busy households.
4. Non-Toxic and Eco-Friendly
Many oil finishes are made from natural ingredients, making them safer for homes, especially those with children and pets. Unlike synthetic finishes, which can emit harmful fumes, natural oils have little to no VOCs (volatile organic compounds), contributing to better indoor air quality.
5. Allows for Easy Repair
When wood floors are scratched or damaged, repairing an oiled floor is relatively simple. Instead of sanding and refinishing the entire surface, you can spot-treat the affected area by cleaning, applying oil, and buffing it out. This ease of repair can save time and money in the long run.
6. Helps Regulate Humidity
Oiling can help wood floors manage humidity levels. Natural oils can absorb moisture when humidity levels are high and release it when they are low, helping to prevent the wood from swelling or shrinking. This quality can enhance the longevity of your floors, especially in regions with fluctuating humidity levels.

Techniques for Oiling Wood Floors
There are various techniques for oiling wood floors, and the best method can depend on the type of oil used, the floor’s finish, and your preference. Here are some popular methods:
1. Choosing the Right Oil
Before you begin, choosing the right oil for your wood floors is essential. Here are a few common types:
- Linseed Oil: This traditional oil is derived from flax seeds and provides a rich finish. It can take a long time to dry, so it’s best for those who don’t mind waiting.
- Tung Oil: Known for its durability and water resistance, it penetrates well and dries faster than linseed oil. It’s an excellent choice for high-traffic areas.
- Danish Oil: A blend of oils and varnishes, Danish oil provides a beautiful finish and is easy to apply. It offers good protection against moisture and is available in various sheens.
- Hardwax Oil: This product combines oils and waxes, providing a matte finish while protecting against stains and scratches. It’s popular for its natural look and feel.
2. Preparing the Floor
Proper preparation is key to achieving a beautiful finish. Follow these steps:
- Clean the Surface: Begin by sweeping or vacuuming the floor to remove dirt and dust. For deeper cleaning, use a damp cloth or mop with a mild detergent. Make sure the floor is completely dry before proceeding.
- Assess the Current Finish: If your floors are already finished, you may need to sand them lightly to create a better surface for the oil to adhere to. Use fine-grit sandpaper (around 120 to 220 grit) and sand in the direction of the grain. Vacuum and wipe down the floor afterwards to remove any dust.
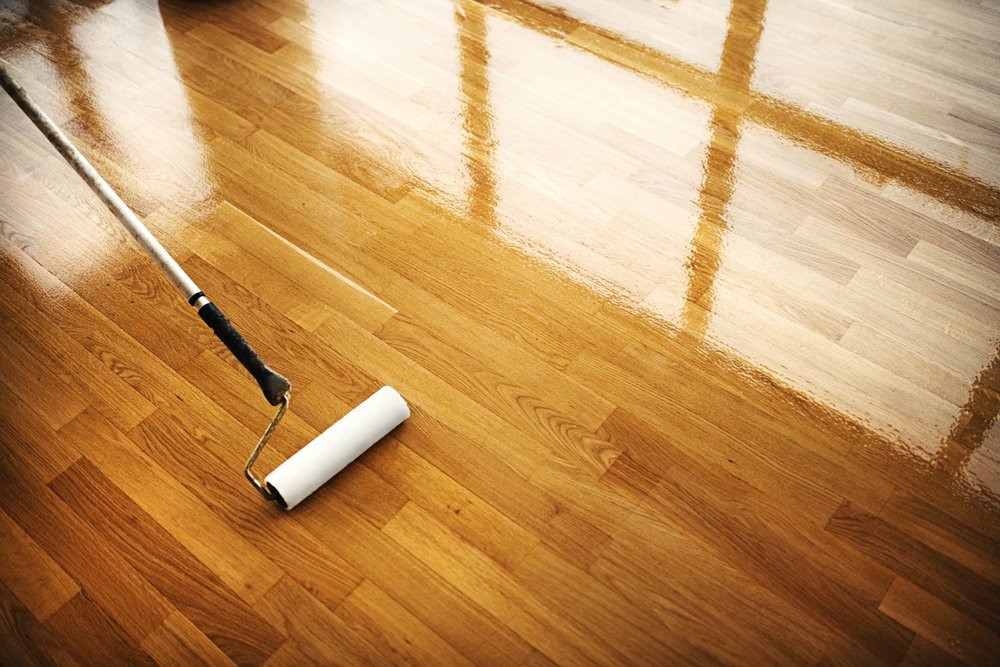
3. Applying the Oil
Once your floor is prepped, you can start applying the oil. Here’s a step-by-step guide:
- Test the Oil: Before applying oil to the entire floor, test it on a small, inconspicuous area to ensure you like the colour and finish.
- Apply the Oil: Use a clean, lint-free cloth, roller, or brush to apply the oil. Work in sections, starting from one corner of the room and moving toward the exit to avoid stepping on freshly oiled areas. Apply the oil liberally, ensuring even coverage.
- Let it Soak: Allow the oil to penetrate the wood for the time the manufacturer recommends (usually 15-30 minutes). If the oil starts to dry on the surface, apply more to keep it moist.
- Buff the Floor: After soaking, use a clean cloth or a buffing pad to remove excess oil. Buff in the direction of the wood grain to ensure a smooth finish. This step helps to prevent a sticky residue and promotes even absorption.
- Allow to Dry: Let the floor dry completely. Drying times will vary depending on the oil used, temperature, and humidity, but the floor typically takes 24 hours to cure fully.
4. Reapplying Oil
Over time, your wood floors will require maintenance. Here’s how to keep them looking their best:
- Regular Inspections: Periodically inspect your floors for signs of wear, such as dullness or scratches. Spot-treat these areas as needed.
- Reapply Oil: Depending on foot traffic and wear, you may need to reapply oil every 6 to 12 months. Follow the same application process, but you may not need to sand if the finish is still intact.
Maintenance Tips for Oiled Wood Floors
To ensure the longevity and beauty of your oiled wood floors, consider these maintenance tips:
1. Regular Cleaning
Keeping your floors clean is essential for maintaining their appearance and durability. Here are some cleaning tips:
- Sweep or Vacuum: Remove dirt, dust, and debris regularly. Use a soft-bristle broom or a vacuum with a hardwood floor attachment to avoid scratching.
- Damp Mopping: Use a damp mop with a mild, pH-balanced wood floor cleaner occasionally. Avoid using excessive water, as it can damage the wood.
2. Protecting the Surface
To prevent scratches and wear, take these precautionary measures:
- Use Area Rugs: Place rugs in high-traffic areas near entryways to catch dirt and reduce wear.
- Felt Pads: Attach felt pads to the bottom of furniture legs to prevent scratches when moving items.
- Avoid High Heels: Discourage wearing high heels on wood floors, as they can cause indentations.
3. Control Humidity
Maintaining a stable humidity level can help prevent the wood from expanding or contracting:
- Use a Humidifier or Dehumidifier: In dry or humid climates, using a humidifier in winter or a dehumidifier in summer can help maintain optimal humidity levels.
- Monitor Temperature: Keep the indoor temperature between 60°F and 80°F to minimize fluctuations affecting the wood.
4. Spot Cleaning
For spills or stains, it’s essential to act quickly:
- Blot, Don’t Wipe: Use a clean, dry cloth to blot the spill rather than wiping, which can spread the liquid.
- Use Mild Soap: A mixture of water and a few drops of mild soap can be used for stubborn stains. Avoid harsh chemicals, as they can damage the finish.
5. Schedule Professional Maintenance
Consider scheduling professional maintenance every few years depending on the foot traffic and wear level. Professionals can assess the condition of your floors, reapply oil, and handle any necessary repairs.
Conclusion
Oiling wood floors is an effective way to enhance their natural beauty while providing necessary protection. With the right techniques and maintenance practices, you can keep your wood floors looking stunning for years. By embracing the benefits of oiling and following proper care guidelines, you’ll ensure that your wood floors remain a cherished feature of your home.
Key Takeaways
- Oiling wood floors enhances their natural beauty, provides durability, and allows for easy repair.
- The choice of oil significantly affects the finish and protection level; consider natural options like linseed or tung oil.
- Proper preparation, application, and maintenance are crucial for achieving the best results and extending the life of your wood floors.
- Regular cleaning, protection measures, and humidity control contribute to your floors’ overall health and appearance.
By understanding the advantages of oiling wood floors and implementing a solid maintenance routine, you can enjoy the beauty and functionality of your wooden flooring for generations.